Search

Anna's Bonne Bouche

Determined to bloom where I am planted, no matter how rocky the soil.

Tag

kitchen

Theory of Perfect Loaf- Potato Bread

image

Ever try Hawaiian bread? Our local grocery  carries a brand that is a family favorite. While I do enjoy the soft, slightly sweet bread, I do not enjoy the price. Being that we are in penny-pinching mode around here, I do try and not inflate our grocery bill with expensive items. This includes bread.

Following is a recipe for my own version of that soft bread we like so much, for a fraction of the price of store bought. Now, I am not saying this is a copy cat of that recipe. However, it is a lovely, soft, white bread that has a rich, slightly sweet flavor that is reminiscent of that commercial brand. This bread goes well with soups, makes tasty sandwiches, and is great with just butter and jam.

My family really enjoys this bread, it disappears quickly, and I don’t have to buy the expensive version. It also makes use of something I usually have on hand, leftover mashed potatoes.

Potato Bread

image

Ingredients :

1 (1/4 ounce) package of active dry yeast
1/4 cup warm water (110-115°F)
1 cup warm milk (110-115°)
1/4 cup shortening
1/2 cup warm mashed potatoes
1 egg
1/4 cup sugar
1-1/4 teaspoon salt
4 cups all-purpose flour
1 tablespoon butter,  melted

Procedure :

Load bread machine with all ingredients, except butter, according to manufacturers instructions, and allow to process through first rise
OR-
In a mixing bowl, dissolve yeast in water. Add milk, shortening,  potatoes,  egg, sugar, salt and 2 cups flour. Beat mixture until smooth. Add enough remaining flour to form a soft dough. Turn onto a floured surface and knead until smooth and eliastic. Place in a greased bowl, turning once to grease top. Cover and allow to rise in a warm place until doubled, about one hour.

image

Punch dough down, then shape into a loaf.

image

Place dough loaf in a greased 9×4″ loaf pan, then allow to rise in a warm place until doubled, about 45 minutes. Then bake risen loaf at 350°F for 45 minutes, or until golden brown.

image

Brush melted butter over baked bread and allow to cool on a wire rack.
This recipe can also be made into delicious dinner rolls. Simply take the dough, after first rise and punch down, divide in half, then divide the dough into 12 pieces. Roll each piece into a ball and place in a greased baking pan. Allow to rise until doubled, then bake at 400°F for about 30 minutes.
Enjoy!

Posted from WordPress for Android

Study Time Snacks- Homemade Beef Jerky

image

My classes have begun! It has been many years since I have studied anything this intensely. It has been about 14 years since I was in college, so getting back into the habit is a challenge.  This being a subject that is new to me, it is requiring a great deal of concentration on my part to keep the knowledge in my brain and then spill it back out onto exams and assignments. 

It is important to keep my concentration high, and having a growling stomach definitely distracts me from that. Hunger is bad for the brain, so having some snacks during study time is my way of keeping my mind on track.

This Homemade Beef Jerky is a great treat for my bookworm time. It is seasoned with a savory dry rub, which has wonderful flavor. The texture is slightly chewy, as you would expect in a jerky, but not brittle or hard enough to wear out your jaw while you eat it.

I don’t usually get to enjoy jerky, unless I make it myself. That pesky black pepper allergy keeps me from eating most commercial versions and many of other’s homemade ones.  I found this version online, and like most recipes I find, altered it to suit my tolerance.  Most people who have tried it don’t miss that black pepper flavor, as it is suitably spicy from the substitution of a small amount of cayenne.

One note.of importance is that the most lean cuts of beef (or venison, if you prefer) are used. Fatty meat just makes the jerky oily, overly chewy, go rancid quickly, and it doesn’t really absorb that savory rub that makes this jerky so tasty. I try and buy sirloin steaks or other lean roasts when they are on sale for this recipe. You may use fatter cuts, but you must make sure they are well trimmed before you season them.

HOMEMADE BEEF JERKY
Ingredients :

5 pounds lean beef or venison
3 tablespoons  course sea salt
3 tablespoons  Dry Rub Seasoning blend (recipe below)

Dry Rub Seasoning Blend-

2-1/2 tablespoons paprika
2 tablespoons  course sea salt
2 tablespoons garlic powder
1 tablespoon onion powder
1 tablespoon cayenne pepper
1 tablespoon dried oregano
1 tablespoon dried thyme

image

I used a beef eye of round roast for this particular recipe. You will also need a sharp knife, cutting surface, plastic wrap and a shallow pan for these steps in the process.

image

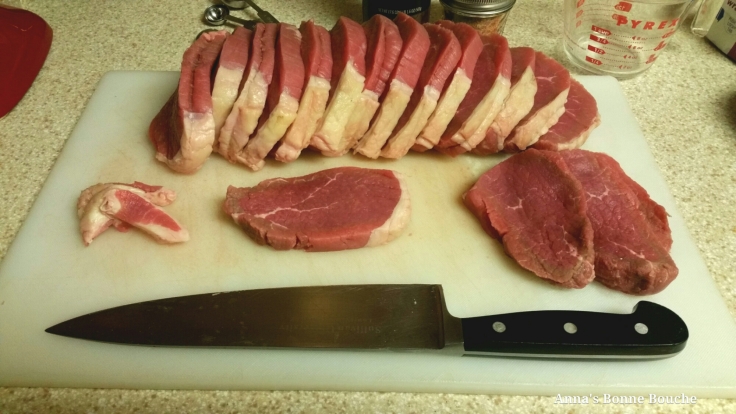
I first sliced the roast into 1/2 inch slices, then trimmed those of fat

image

I then sliced those trimmed pieces so they became 1/2 inch thick and 1 inch wide.

image

Mix up your dry rub. Your dry Rub seasoning can be stored in a little, airtight jar for later use. It will make enough for about 3 batches of jerky.

image

Mix your Dry Rub Seasoning with the sea salt in a container that makes it easy to sprinkle evenly over your meat pieces.

image

Lay your meat slices in your pan over plastic wrap in a single layer. Sprinkle with seasoning, flip over and season again on the other side. Layer plastic over seasoned slices, and repeat until all your meat is seasoned.

image

Wrap the seasoned pieces well, and then refrigerate 12 hours.

image

Place the meat slices evenly on your dehydrator racks. You want enough room between the slices that the air can circulate well.

image

Follow factory instructions of your dehydrator for meat. Mine was set to 160°F. Allow to dry for 6-8 hours,  or until pieces are dried uniformly.

image

Dried pieces will be dark in color and have very little “squish” factor. I check my jerky after the first five or six hours  to remove the smaller dried pieces, so that they do not become hard and brittle.

image

Once done, these delicious beef snacks should be stored in airtight containers. I keep mine in the refigerator for long term storage, though I have never had a batch spoil at room temperature.

I hope you enjoy this savory snack as much as I do. Now it’s time for me to grab a handful of jerky and  to hit the books again!

Until next time, dear readers!

Posted from WordPress for Android

Deciding About December

image

December has finally drawn to a close, and with it 2015.  The month started with more setbacks, as my husbands job became subject to a “Last in , First Out” thing when business took a downturn.  It is a bit of a rough way to start out the month, much less the new year.  We keep making our plans, though.

The month’s weather kept with the theme it had all year, rain and more rain.  The unseasonably warm temperatures gave rise to a some nasty storms. Those storms left us with downed branches and bog over the entire property.

We were lucky enough to avoid the tornados that plagued the rest of the state, but we are still slogging in the mud. Those vehicles not parked on our paved driveway have been sinking into it, making for some muddy adventures as we try and pull them free of the muck and move them to drier ground.

Oh yes, so much adventure.

I am grateful for my mud boots, or I would have ruined a few pairs of shoes already.

image

The warm weather has allowed my pepper plants to continue to bloom and set fruit. My plants  , that have survived this long, are covered in peppers of green and purple. Some are getting quite large. I do believe the lack of sun has kept them from ripening to red and yellow, but they are still tasty.  I am content to let them keep going until they are ready to keel over on their own, or the squirrels rob me again.
image

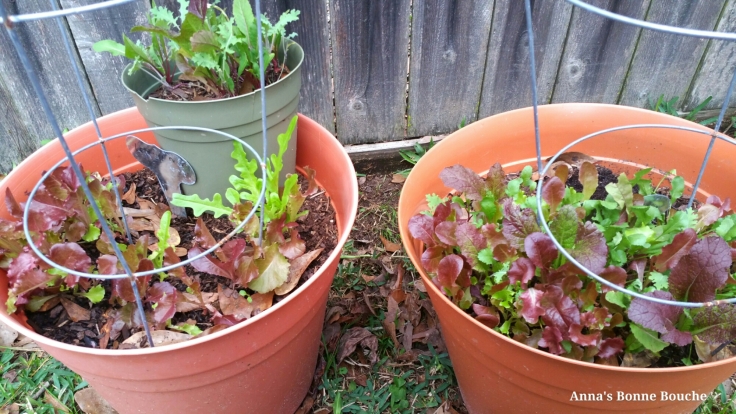
We could not save the radishes and most of the lettuce from my scratching hens obsessive habit of destruction  of all things garden. Only two pots remain of mixed lettuce,  saved only by a half baked idea of using a tomato cage in the pots. It keeps the girls off the pot. They lost interest in the lettuces once they couldn’t get their big backsides up there to scratch up the dirt.

image

Mostly, my garden has been pulled up, the pots empty and set aside for a few weeks. Not for long,  though.  It will be time to start planting my spring garden soon.

I am excited about this year’s garden and have been pouring over seed catalogs, making lists  of seeds and sets I want to order for my spring planting. I also have been taking inventory or what pots I have here and need to look into storage for more, and also gather up my seed trays.

Being limited on budget, I am having to be frugal and creative. The big expense will probably be the actual seeds and sets. The rest will be using what we have on hand and can dig from random items laying about.

So far, a baby swimming pool and a few cloth shopping bags have pulled as possible planters. Some old rolled wire fencing has been pulled for chicken barrier. Planting does no good if my hens destroy what I have put out. Little greedy things that they are.

image

One thing I don’t have to purchase is good dirt. My compost pile, started in May of this last year, has grown large on a steady diet of kitchen vegetable  scraps, leaves, grass , chicken egg shells and poo. The compost is dark , rich and there is enough to make a big, healthy garden this year.

image

My dear husband, and my father made one of two potato boxes I want for this year, from scrap lumber we have on property.  They only made one, just to see if this was what I wanted and was describing as I waved my printed Pinterest potato box plan around. It was, and now just needs to have the bottom plastic bag ring stapled in.

Another box is under construction as I write, then they will be filled in with dirt, potatoes planted, then boarded up as the plants grow. This will be my first year with potatoes.  I am excited to try it.

image

My Poo-Princesses are still toddling about the yard, getting big off a steady diet of bugs, greens and layer ration.  I am glad I took the leap last year and went ahead and got them.  They have eliminated our spider problem, I hardly ever see snakes in the yard, they turn my compost for me,  and are sweet girls and fun to watch. 

My having hens  as ‘pets’ this year has  led to my being dubbed, “The Crazy Chicken Lady” amongst friends, family and neighbors.  This led to a ‘theme’ appearing in my social media accounts  in the form of pictures and articles people tag me in, that have anything to do with chickens.  It also was the theme of many gifts I received this year for the holiday.
image

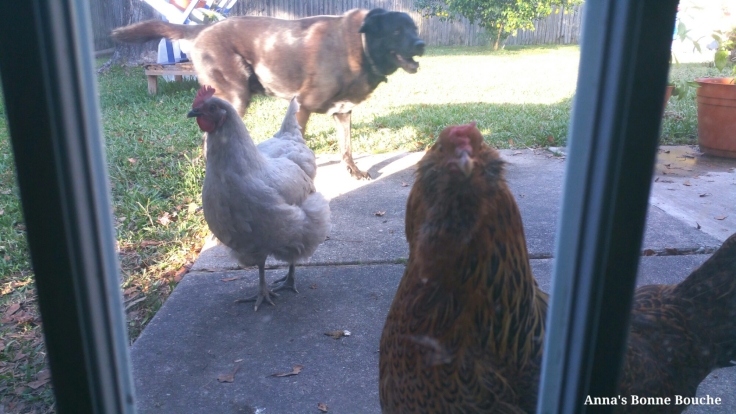
Maybe they are right.  I am crazy about my hens. They get good, nutritious feed, a solid house to rest in,  tasty treats, and even get warm oatmeal  every evening on cold nights before they roost up for the evening. I love talking about my girls, and most people who come to visit usually are taken outside to observe my feathered beauties. I even convinced the big dog, who hates birds, to watch over them while they roam out in the yard all day.

image

There is danger everywhere when you are a chicken.  Death from above is a very real possibility here.

image

So , it was easy to train the big dog to keep the bad birds out of the yard. It was not so easy to convince him to not chase the “good birds” a.k.a. MY HENS, in the yard. In the end, bribery won the day. The big dog takes payment for his services in the form of extra treats and/or extra love.

image

Our reward for this devotion to my fluffy ladies is fresh eggs every day.

An incredibly useful gift for this chicken lady, this year, was an egg skelter. I have wanted one so badly, but was unable to find one at a price I could justify. I have one now! I am so glad my daily trip back from the coop no longer includes finding a sharpie and writing dates on the eggs. My mother gave me this for a holiday gift, along with a few other fun kitchen items.  One of those fun items was a Rooster Kitchen Timer that crows a loud, “Cock-a-doodle-do!”, or its own rendition of “The Chicken Dance” with a flip of a switch.
Probably a very appropriate gift for a Crazy Chicken Lady.

image

The lack of sun has made for a slow ripening of all the lemons on our lemon tree. They have been ripening, though. Where we had been picking off a lemon every once in a while, we had a day where we had half a tree of ripe lemons all at once.

image

Big  ole fist-sized lemons. Hundreds of them. Some were given away, the others were squeezed into juice.

image

It took a while, but I managed to squeeze out about 10 quarts of juice from that one basket full. Most of it was jarred and then frozen. We still have another basket full waiting on the tree.

I see plenty of lemonade and lemon-flavored food in our future.

image

Another great gift was this shelf my husband built for me to store my things in.  He built it from left over 3/4″ plywood we bought for building the coop. It is a wonderful use of the scrap wood, and it turned out great.  I was excited to get it in the room and start putting things in it.

It even makes a great spot for another gift for the chicken lady. A cute black hen, that heats scented wax and makes the room smell heavenly, sits on top.

This shelf is the first of a few projects we have planned for the next few months.. We need to  build out and repair bedroom furniture for ourselves.  We gave away our entire bedroom set when we moved. What we have now is either borrowed, or something that was used for something else, but is now bedroom furniture. 

We will get there, one piece at a time.

image

My books have arrived for my course. Class starts this week. I am excited to start, but I am more excited to finish. If there ever was a time we needed me making good money, now would be it. First to get my training, then the job. I am just glad it is a course I can do at my own pace, so I can get through it as fast as I can absorb the material. 

image

The rain continues on into the new year. We are making an effort not to get as bogged down and gloomy personally as the weather has been outside.  Our situations,  like the weather, can change anytime. Some days are more rain than sun, but the sun does come.

image

My parents have left again on their travels. My husband and I are alone. Well, except for a moody big dog. He is  lonely because my parents dog left on the trip with them.  Poor Big Dog. Extra loves are the only remedy.

image

Also a small cat, who suddenly realized he need not hide under the bed, plotting against us in secret, anymore. He can now plot in the open, without fear of seeing “The Man”. “The Man” a.k.a. My Father, has never hurt the small cat, but the small cat still thinks he is terrifying.  No amount of love remedies being a small, scaredy cat.

I have made no resolution this year. Just plans. Having a bigger container garden, caring for my animals,  making and refinishing a new bedroom for us, going back to school, and hopefully getting a good paying job are plenty to keep me busy for the next few months.  Maybe we will get thrown a bone and my husband will find good work soon.

Until then, we just keep on keeping on.

Now I leave this long post with a reward! A short Tale From the Broken Cookie Jar- Doggie Edition
image

DON’T EAT MY CHICKENS, CHICKEN FLAVORED DOG BISCUITS

Ingredients :

3 cups all-purpose flour
3/4 cup cornmeal
1 cup chicken stock
4 tablespoons butter, softened
1 egg
1 tablespoon milk

Preparation :

In a large mixing bowl, combine flour, cornmeal, chicken stock and butter. Knead dough until well combined, about 3 minutes.

On a lightly floured surface, roll out dough to a thickness of 1/4″. Cut out shapes with a cookie cutter. Place cut biscuits on an ungreased cookie sheet.

Beat egg and milk together in and small bowl. Brush egg mixture over biscuits.

Bake in an oven preheated to 325° for 35 minutes. Cool completely on a wire rack.  Store in an airtight container.

Posted from WordPress for Android

More Tales From the Broken Cookie Jar: Pistachio Bars

image

Today I wanted to share another of the treats I sent in the holiday gifts this year. This cookie bar is my most requested cookie during the holidays.

These bars have a wonderful combination of sweet and salty flavors, and a chewy, sticky texture that people find irresistible. The only complaint I have ever heard about them is that I never send enough of them in the boxes.  Well, for those people, I post THE RECIPE, so that you may have these delectable cookies anytime your heart desires.

PISTACHIO BARS

Ingredients :

Crust-

2 cups all-purpose flour
1/2 cup sugar
1 cup cold butter

Topping-

2 eggs
1/2 cup sugar
1/2 cup light corn syrup
2 tablespoons butter, melted
1/2 teaspoon vanilla extract
2 cups shelled pistachio nuts, coarsely chopped
1 cup flaked coconut

Preparation :

image

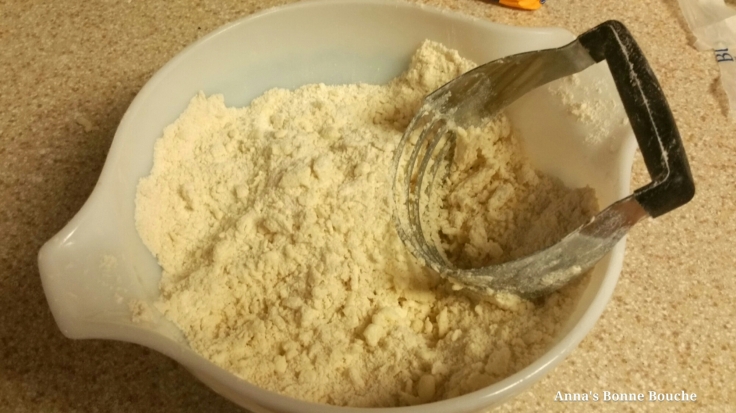
In a medium bowl, combine flour and 1/2 cup sugar, mix well. Cut in 1 cup cold butter with a pastry blender, until mixture resembles course crumbs.

image

Press mixture into the bottom of a greased 13×9 baking pan. I like to line my pan with foil to ease removal of the bars from the pan for cutting. Try to press the crust in as evenly as possible.

image

Bake at 350°F for 20-25 minutes, until light golden brown.

image

Meanwhile,  in large mixing bowl, lightly beat eggs.

image

Add sugar, corn syrup, butter and vanilla to eggs and mix well.

image

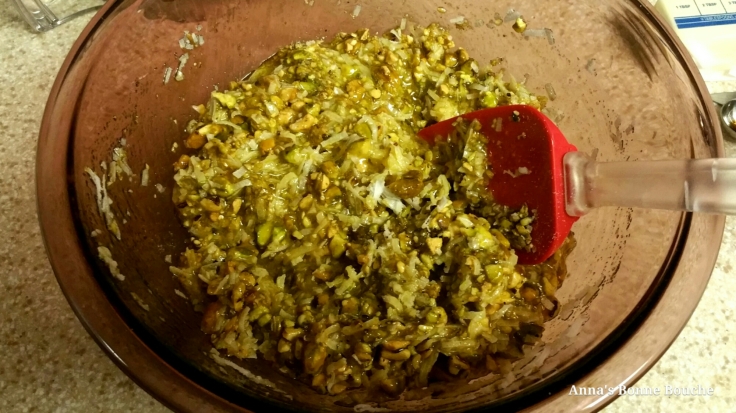
Add pistachios and coconut to mixture and mix until throughly combined.

image

Cool crust on a wire rack for 10 minutes. Above, you can see the reason why the crust needs to be evenly pressed. Don’t worry of you do get some darker spots. As long as it isnt burnt, no one will notice once the topping is on it.

image

Spread pistachio topping over warm crust as evenly as possible. Be careful as you spread it over, that you do not pull up the crust.

image

Return pan to oven (350°F) for another 15-20 minutes, until the edges are golden brown. Allow to cool on a wire rack for at least 1-1/2 hours or until completely cooled. Cut into bars.

I truly enjoy these cookies, and look forward to making them every year. Though I will admit I have a love for all things pistachio.  Cookies, pudding,  ice cream, even raw eating, those little green wonders really make my palate happy.

Now that I have given away my secret I will have to come up with some new recipes for goodies in next year’s boxes. That’s part of the fun, though, because it requires experimentation.  Experiments mean we will be tasting many goodies to see if they make the cut for special gifts.

It will be hard, I am sure, forcing down all those new cookies and candy.  I am willing to make that sacrifice for my friends and family, so that they may enjoy a little something special during the holidays.

Enjoy!

Posted from WordPress for Android

More Tales From the Broken Cookie Jar: Frosted Molasses Cookies

I made treat gifts for our holiday family gathering this year.
image

Most years I do a pretty varied assortment of cookies and candy. I have some tried and true recipes I have made for years. Most every year I try to do something new.

This year’s gifts offered (Presented clockwise from the top left)  :

Chewy Chocolate Chip Cookies- My Blog post with that recipe is on this link  http://wp.me/p6BnLk-4N

‘Salted Chocolate Caramel Cookies’, a recipe I got from Pinterest.

Strawberry “Fruit Magic”. Basically, it is some homemade strawberry jam, applesauce and cinnamon, then dehydrated into a fruit roll-up.

Dry Rub Beef Jerky, My favorite way to make beef jerky and another gift from the dehydrator.

Pistachio Bars- This is one of the old standbys and the most requested of the Holiday cookies. I will share this recipe in the next post.

Rounding out the boxes were Frosted Molasses Cookies, a childhood favorite of mine, and the subject of today’s recipe. They have a great molasses flavor, and a chewy texture. The frosting is a sweet vanilla glaze, that really is a great compliment to the spicy cookie.

FROSTED MOLASSES COOKIES

Ingredients:
1-1/2 cups butter, softened
2 cups sugar
2 eggs, lightly beaten
1/2 cup molasses
4 cups all-purpose flour
2 teaspoons baking soda
1 teaspoon cinnamon
3/4 teaspoon ground ginger
1/2 teaspoon cloves
Frosting:
1-1/2 cup powdered sugar
3 tablespoons butter,  softened
1 tablespoon vanilla
1-2 tablespoons milk

Procedure:
image

In a large mixing bowl, cream butter and sugar
image

Add eggs and molasses, and mix throughly
image

Combine dry ingredients, and blend into the wet mixure.
image

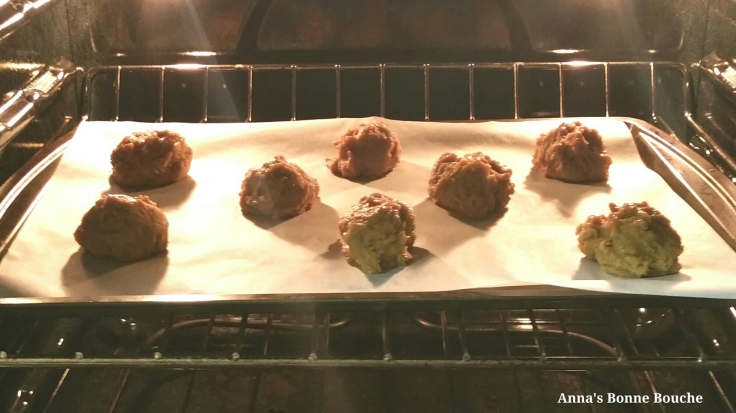
On a greased baking sheet,  or one lined in parchment paper (as above),  roll dough into balls about the size of walnuts.  I like bigger cookies, so I went with a little more cookie dough.
image

Bake cookies for 10-12 minutes in an oven preheated to 350°F.
image

Meanwhile mix together all frosting ingredients  and beat until smooth and creamy.
image

Remove baked cookies from oven to racks to cool. Frost while warm. I like to let my frosted  cookies air dry for a few hours. It helps to harden the frosting enough to not be sticky and hold its shape when touched gently.  I then stored in airtight bags until ready to use.

Yeild: 2-3 dozen

These cookies always remind me of family time from my childhood. Not so much holidays as fishing trips with my father, when i usually would get them as a snack on the boat. Good times, though.
These cookies do have that combination of spices that smell so warm and wonderful coming from the oven, this time of year. It put me in the holiday mood  to bake them.

I hope you enjoy them, too.

Posted from WordPress for Android

Say Cheese!- Cream Cheese Making

image
Photo credit- Memegenerator.com

Not that long ago I decided to try my hand at cheese making. I have made cheese before, but it was while I was in Culinary school, and about 15 years ago. I remember it being a fun process, but time consuming. Living in the city, working full time, and having children cut the amount of expendable hours I had for such a project. Also, I was close enough to specialty markets that I could buy cheeses anytime I liked.  Now that my children are out of the nest, and my free time has become more plentiful,  I decided to try my hand at cheese making,  once again.

I can still go to a specialty market and get any type of cheese I want, but this is another of those homestead skills I wanted to add to my mental toolbox. That, and we love cheese here. We eat it in meals, as snacks, spread it on bagels, and put it in sandwiches, desserts, appetizers… the list goes on and on. We love cheese here, I have the skill set to make it, so why not make it at home? So, I bought some cheese making books on Amazon, ordered some cultures and equipment, and then set to making some yummy cheese.

I decided to start with some quick, fresh cheeses. Cream cheese is a staple in my kitchen.  I use it often in recipes, and my family frequently enjoys on their morning bagels. I decided to start with an uncooked curd method, just to get a feel for the process again.

CREAM CHEESE (UNCOOKED CURD METHOD)

image

Equipment –
Non reactive,  stainless steel pot
Stirring spoon
Accurate thermometer
butter muslin
colander
large bowl
I had my curd ladle ready, but didn’t use it.
Make sure you equipment is clean, clean, clean before you start. You don’t want to contaminate your cheese as it sets up. That would be very bad for you and the cheese.
Ingredients
2 quarts pasturized half and half (low heat pasturized, if possible. Ultra pasturized has less yeild )
1 packet direct-set mesophilic starter
cheese salt
fresh herbs (if desired)

image

I ordered my culture online from Amazon.  It came with 5 packets of starter, which I store in the freezer.

Preparation-

image

Warm milk to  room temperature,  72°F.
As my milk was cold from the refrigerator,  I warmed it gently in my stockpot on the stove.

image

Add one packet of starter…

image

… and mix throughly.

image

Cover and let stand at room temperature…

image

… For 12 hours

image

Place your colander inside a large bowl. Line colander with a double thickness of butter muslin. Transfer the contents of the stockpot into the lined colander. The curd will be like pudding. Tie the muslin around the cheese securely. “SECURELY” IS THE KEY WORD HERE. You will be making a potential cheese bomb when you do the next step if your knots come loose.

image

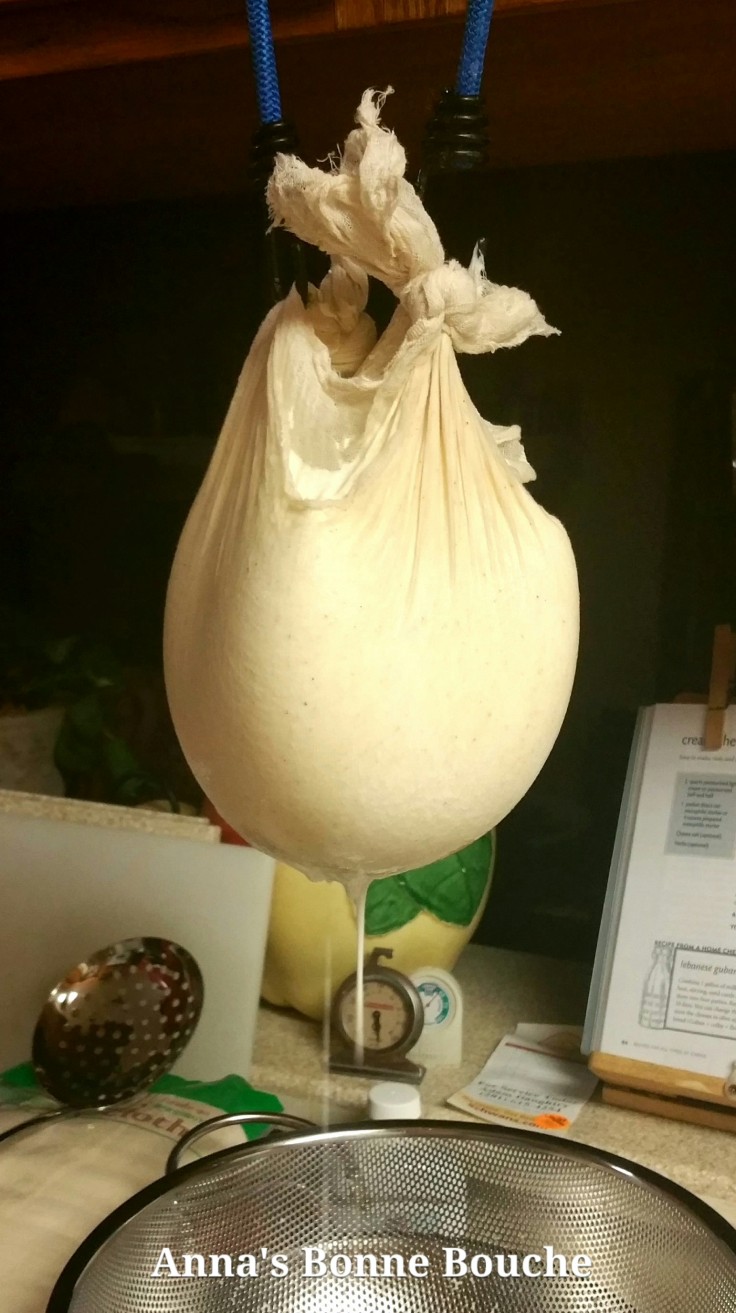
I used short bungee cords with hooks to hang it to drain over colander…

image

…for another 12 hours

image

Change the muslin once or twice during the hanging to speed the process along.

image

Remove the cream cheese to a bowl and beat in salt (and herbs, if desired ) to taste.

You can transfer into smaller cheese molds and chill in the refrigerator until firm. Then unmold the cheese and wrap individually in cheese wrap. Store in the refrigerator for 1-2 weeks

Yeild: 1 pound cream cheese

image

Ok, this is the ugliest picture of a bagel ever, but my husband was impatient to try my experiment right away. It was delicious. The cheese comes out softer than with a cooked curd method, but it cooks and bakes well in recipes, and is great for fresh eating.

I am anxious to try my hand with more cheeses soon. I am eyeballing a cheese press right now, but it will most likely wait until after we move and I can set up and proper cheese cave for aging. In the meantime, I see many more fresh cheeses in our future… yum!

Posted from WordPress for Android

Fall Food: Oven BBQ Pork Ribs

image
I know that ribs are thought of as more of a summer meal. Grilling and summer go hand in hand, after all. When the hot summer months are here I do not enjoy being stuck in a steamy kitchen with the oven going. However, it is fall now. Our weather is a bit unpredictable as of late, and we have not been grilling as often as we had done previously. We still want to enjoy BBQribs, though. Especially when I find them on sale at our local market!

This recipe is actually a shorter version (time wise) of pork ribs that are done on the grill. The grill version has a long and low oven cook time, a marination time, and then they hit the grill for a bit of finishing and grill marks.  They result in a melt-in-your-mouth rib that has a great BBQ tang to it. This version is faster to the table, but also makes a tasty and tender rib my family really enjoys, without sacrificing the refrigerator space for 8 hours, or me running in and out the door to watch the ribs and finish the rest of the meal.

OVEN BBQ PORK RIBS
Ingredients :
4 lbs pork baby back ribs, cut into serving sized pieces
3 teaspoons minced garlic
1 tablespoon sugar
1 tablespoon paprika
2 teaspoons seasoned salt
2 teaspoons chili powder
2 teaspoons ground cumin
1 small onion, finely chopped
2 tablespoons butter
1 cup ketchup
1/4 cup packed brown sugar
3 tablespoons lemon juice
3 tablespoons worchestershire sauce
2 tablespoons white vinegar
1-1/2 teaspoons dry ground mustard
1 teaspoon celery seed
1/8 teaspoon cayenne pepper

Preparation :

image

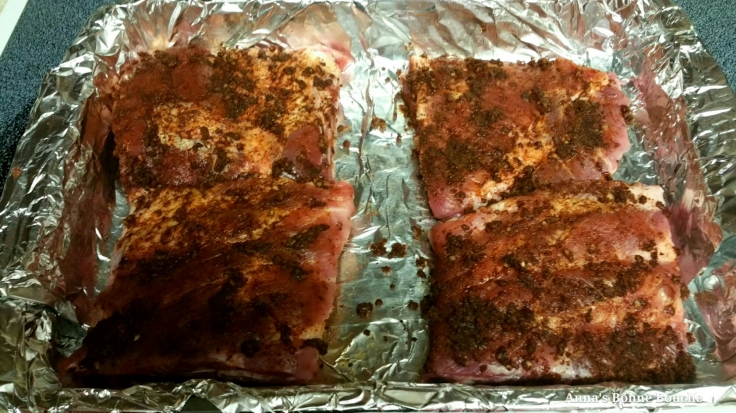
Place ribs in a foil-lined roasting pan

image

Combine garlic, sugar, paprika, seasoned salt, chili powder and cumin in a small bowl, then rub all over the ribs.

image

Cover pan with foil and bake in an oven preheated to 325°F for about 2 hours.

image

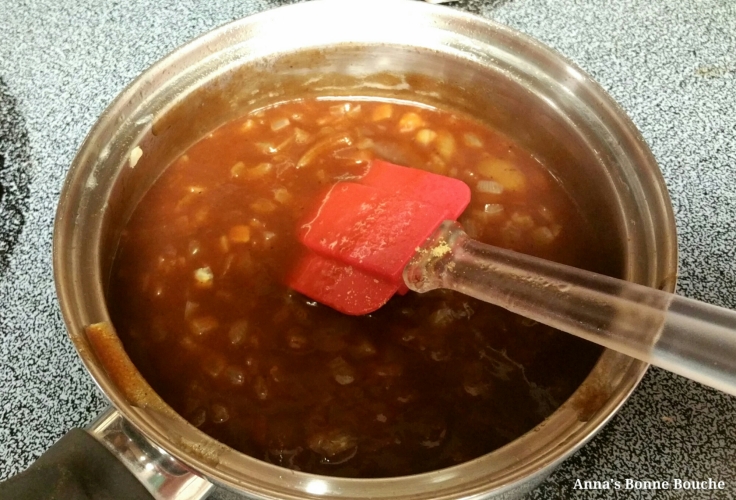
Meanwhile, in a small saucepan, Sautee onion in butter until onion is tender and translucent.  Stir in remaining ingredients.  Bring to a boil, then reduce heat and simmer until thickened, aboit 10 minutes. Remove from heat and no reserve 3/4 cup sauce.

image

Brush ribs with remaining sauce, then bake, uncovered at 375°F for another 30 minutes.

image

Serve with reserved sauce on the side.

Serves 4

We had these last night with roasted onion potatoes and a nice green salad. I hope you and yours enjoy them as much as we did!

Posted from WordPress for Android

More Tales From the Broken Cookie Jar: Pumpkin Edition

image

In a previous article I included a picture of all the Minion pumpkins my mother and I made for Halloween. They were adorable. We received quite a few compliments on them. However, Halloween is over and now we have about 65 pounds of pumpkins to deal with.

As we did not carve them, they are still edible. We felt it would be wasteful to just toss them into the compost, and we try not to waste around here whenever possible.  So we started the day long process of turning Minions into cooked squashes.

First we gave them a hot, soapy bath to wash off the water based paint. Then we cut out the stems then scooped out the pulp and seeds.

I used a colander set in a big bowl to rinse the seeds off in cool water. The pulp would sink, and the seeds floated to the top, making it easy to separate them and wash them.

We saved the seeds, setting them aside to dry. I will add here that you can use paper towels to blot them dry, but it is best not to dry them ON paper towels. The seeds will stick to the paper and you will be spending time plucking stuck, dried seeds off shredding paper towels.  It isn’t fun. Ask me how I know.

After scraping out the innards, I halved the pumpkins and roasted them on a cookie sheet at 350°F for about an hour. They were then cooled, then the cooked pulp was scooped out and put into containers to be frozen. As we have a small oven, I could only do one pumpkin at a time. This took all day and most of the evening.  The end result was about six cups of seeds and about 14 quarts of pulp.

I am not going to lie. By the end of the day I never wanted to see another pumpkin again. The word “pumpkin” gave me a twitch. I dreamed of evil minion pumpkins chasing me that night. It took me a few days to even want to start using the pulpy gold we had made in my cooking.

I did, though, and now I share the first of many pumpkin posts as I put the pumpkin to use in my kitchen.

I will start with the seeds. My family loves crunchy snack stuff. Roasted pumpkin seeds make great additions to trail mixes, tossed in salads, or just eaten by the handful. Some people shell their seeds. You can. I don’t. We eat them shell and all here. I have no patience for shelling. The shells are crunchy and tasty to me anyway. That will stand as my excuse.

image

ROASTED PUMPKIN SEEDS

Ingredients:

1-1/2 cups  dry pumpkins seeds
1 tablespoon melted butter
1/2 teaspoon of any of the following (or combination thereof. They are your seeds, eat ’em how ya like. We aren’t judgey here)
Sea salt
seasoned salt
garlic powder
onion powder
taco seasoning
chili powder
parmesan cheese
oregano
basil
cinnamon sugar
Or, whatever you like. Be creative!

Preparation :

Preheat oven to 300°F

In a small mixing bowl, combine seeds, melted butter and seasoning of choice.

Mix until seeds are well coated.

Spread seeds in a single layer on an ungreased baking sheet.

Bake for 45 minutes, stirring occasionally,  until golden brown.

Cool, then store in an airtight container.

Now for the reason you are reading: Pumpkin Cookies

These cookies have a cake-like texture and a pleasantly spicy flavor. The icing is sweet and sticky, also with a spicy flavor.

You can toss half a cup of raisins in with the walnuts, if you like. They will add a little more fruity sweetness, and a nice chewy texture to the soft cookie. Just a suggestion.

image

PUMPKIN COOKIES WITH PUMPKIN FROSTING

Ingredients :

1/2 cup butter, softened
1-1/2 cups packed brown sugar
2 eggs
1 cup cooked, mashed pumpkin
1 teaspoon vanilla
2-1/2 cups all-purpose flour
3 teaspoons baking powder
1 teaspoon salt
1 teaspoon cinnamon
1/2 teaspoon allspice
1/4 teaspoon ginger
1 cup chopped walnuts
1/2 cup raisins, if desired

Preparation :

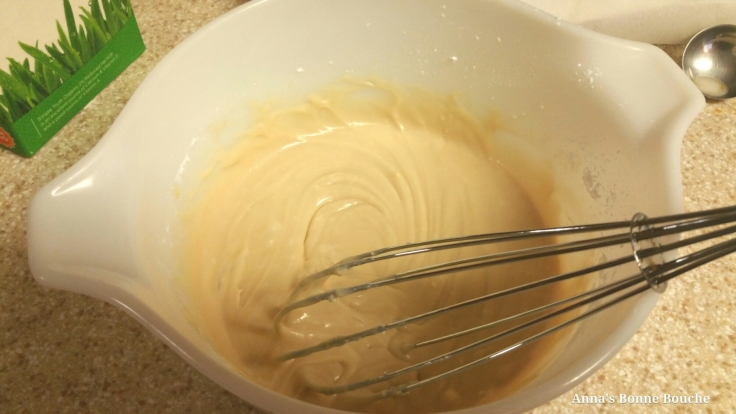
In a large mixing bowl, cream together butter and brown sugar. Beat in eggs and pumpkin until light and fluffy. Stir in vanilla.

In a separate bowl, mix together flour, baking powder, salt, cinnamon,  allspice and ginger.

Add dry ingredients to creamed mixture and mix until combined. Add walnuts (and 1/2 cup raisins, if desired) Dough will be very soft.

Spoon out dough onto a greased baking sheet, by rounded teaspoonfuls,  about 2 inches apart.

You can also use a baking sheet lined with parchment paper. This helps keep the bottoms from browning too fast.

Bake at 375°F for 12 to 15 minutes.

Remove from sheet while hot onto a wire rack.

Cool slightly, spoon frosting (recipe below) over cookies while warm, then allow to cool completely.

SPICY PUMPKIN FROSTING

Ingredients:
1-1/2 cups sifted powdered sugar
2 tablespoons softened butter
1 teaspoon cinnamon
1/4 teaspoon allspice
3 tablespoons mashed, cooked pumpkin

Preparation :

Mix together all ingredients in a medium mixing bowl until well combined and and smooth glaze forms.

Spoon over warm cookies.

ENJOY!

There will be more pumpkin recipes coming soon! We have to use all this pumpkin somehow, and I am happy to share it with you.

Until the next time, dear readers, Happy Fall!

Posted from WordPress for Android

Fall Food: Chilly Weather Chili

image

The weather teased us with some cooler days this last week. It was a welcome break from the muggy, warm and rainy weather that we have been experiencing lately. Although the shadows are long, the weather has not caught up to the idea that it should be fall here. We are still wearing shorts and t-shirts. We are still walking around with bare feet or sandals. We are still having to use our air conditioning,  as the warm, humid air filtering in our open windows lends the house a fragrance of Eau de Mildew.

However, last week it was actually chilly. We donned long sleeve shirts and long pants. We wore socks, closed shoes and jackets.  We warmed our hands on our coffee mugs as we sat out on our porch in the morning, watching the dogs chase squirrels.  We sat closer to the fire in the evenings and finally, we ate chili for dinner.

Chili is one of my favorite cold weather meals. A steaming bowl of spicy chili takes me back to my childhood. My parents  regularly participated in chili cook-offs, with my sibling and I in tow. They were such fun, and gave us a chance to try something new, like rattlesnake chili. It was quite delicious, even to a picky 10-year-old.

Chili was also a meal my father would regularly fix for us when my mother worked long shifts or went to visit family. Hamburgers with fries, steak and baked potatoes,  chili and crackers were frequent meals at those times, because that was what he liked to eat and liked to cook. We didn’t mind, as we enjoyed them, too.

Now, as an adult, I still enjoy chili. I have been craving the zing of the peppers, the chunky texture of the meat and beans, and the richness of the thick and spicy tomato sauce enveloping it all.  My mouth waters at the thought!  It has just been too warm for it… until last week.

You can bet I jumped at the chance to pull out my ancient  crock-pot and  brew that warming concoction of meat, beans and spices.

image

This crock-pot was given to me by my grandfather twenty-five years ago,  and it was used by him  before that. I do have a newer, larger, and prettier crock-pot,  which would probably lend itself better to pictures. It is buried, however, in the black hole that is my storage unit. So we use what we have, and my old, faithful crock-pot has made this recipe many times before. It brings me welcome memories of my beloved Grandpa, who passed away a few years ago, warming my heart even more than the chili warms my belly.

The following recipe can be made in the crock-pot or on the stove top, but for this post I am going with crock-pot.  It can also be made with or without beans. I have heard that true chili has no beans, and while I am a fan of the beans, this brew is just as good without them. I will leave that to your personal tastes.

I am also going to add here that, in my haste, I forgot to take a couple of pictures of my cooking method.  I was also baking cookies and cheesy bread twists while I prepared my chili. I can be a bit absent-minded when I am busy and distracted. I also completely skipped the first step, realizing my mistake once I had all the meat in the pot. I assure you the recipe is sound, though., despite my missteps in demonstrating it for you, my dear readers.

Now on with the yummies.

CHILLY WEATHER CHILI

Ingredients :

4 slices bacon, cut into 1/2-inch pieces
2 medium onions, coarsely chopped
1 clove garlic, minced
1/2 pound lean pork shoulder,  course chili grind
1-1/2 pounds beef chuck roast, course chili grind (this is also good if you use 1 pound beef round roast, cut into 1/2-inch cubes and only 1/2 a pound of the ground beef chuck)
1 (2-1/2 ounce) can chopped green chilies
1 tablespoon hot red chili powder
2 tablespoons mild red chili powder
1 teaspoon Mexican oregano
1-1/2 teaspoons ground cumin
1-1/2 teaspoons salt
2 (6 ounce) cans tomato paste
1-1/2 cups water
1 (15-1/2 ounce) can pinto beans, drained

Preparation :
In a Dutch oven (or in my case, a big wok), over medium heat, fry the bacon. Once the bacon has rendered most of its fat, remove it with a slotted spoon to drain on paper towels

Add the onion to the bacon fat in the pot and cook until soft. Add garlic and cook for 2 minutes more.

image

Add pork and beef to the pot. Cook over medium-high heat, stirring occasionally, breaking up any large lumps. Cook until evenly browned. Drain the fat.

image

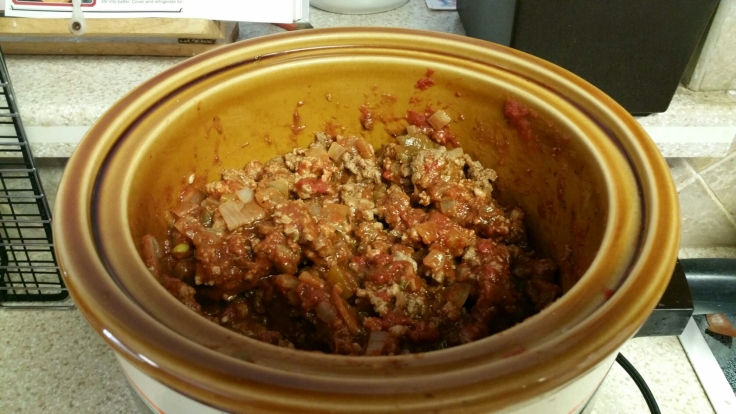
Take cooked meat mixture and remaining ingredients, except for bacon and beans, to the crock pot.

image

Mix the ingredients together.

image

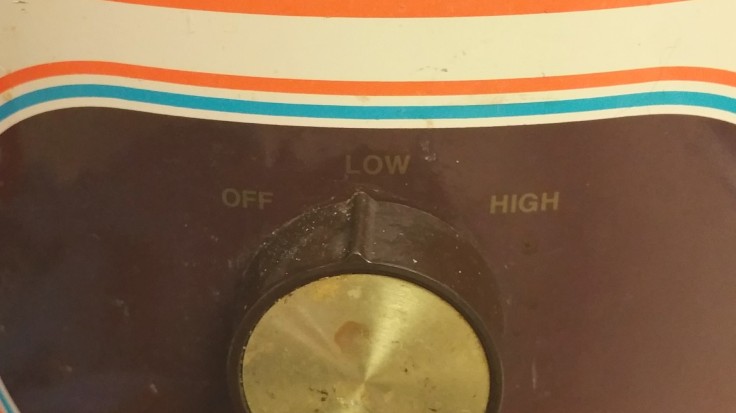
Cover and cook on low for 4-6 hours.

Add beans and bacon, mix, then cook on high for 1 hour.

image

Serve with your choice of condiments.  I enjoy shredded cheese and sour cream with mine. My husband and father like chopped, raw onions with theirs. I know someone who likes theirs over rice or cooked pasta. I also like to serve it with bread twists or saltine crackers.

This can also be made on the stove top. Just follow instructions up to mixing all ingredients together, but the beans and bacon, in the pot. Add 3 cups water instead of the 1-1/2 cup used in the crock pot method. Bring to a boil, then lower heat to a simmer, and cook for 2 hours,  stirring occasionally to prevent sticking. Then add bacon and beans and simmer 1/2 an hour longer.

You might have noticed I did not use any black pepper in my recipe.  I have a nasty allergy to black and white pepper, so I omit it from all my recipes. Feel free to add it to your taste, but the recipe truly doesn’t suffer without it.

I hope you enjoy this chilly weather family favorite at your house as much as we enjoy it in ours. It is very filling and sure to keep you toasty as you go about your fall activities.

Posted from WordPress for Android
Blog at WordPress.com.

Up ↑